The Meaning of Common Symbols on A Bearing Drawing
Bearings are produced according to drawing. When purchasing bearings, it's important to confirm corresponding drawing, so users shall know the basic meaning of common symbols on a bearing drawing.
The drawing can be divided into different types, the general drawing, and parts drawing. The general drawing of a bearing shows its dimensions, structure, tolerance, clearance, precision, materials, etc. The parts drawing shows more details of each component that compose the bearings. Usually, the general drawing is for customers and the parts drawing is for production purposes. Now let's check the bearing symbol in engineering drawing.
The Meaning of Common Symbols on A Bearing Drawing
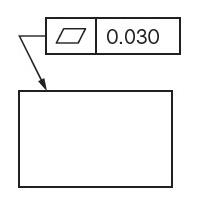
Flatness symbol - It references how flat a surface is regardless of any other datums or features. The flatness tolerance references two parallel planes that define a zone where the entire reference surface must lie. Flatness tolerance is always less than the dimensional tolerance associated with it.
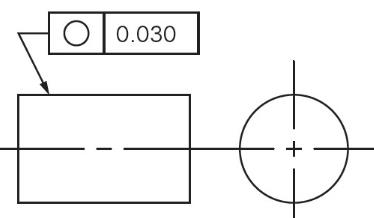
The circularity symbol also called the roundness symbol. It is used to describe how close an object should be to a true circle. Circularity essentially makes a cross-section of a cylindrical or round feature and determines if the circle formed in that cross-section is round.
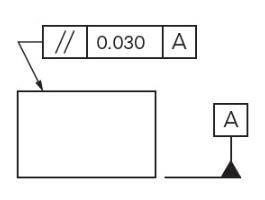
Parallelism is the condition of a surface, line, or axis, which is equidistant at all points from a datum plane or axis. It is important to determine what the reference feature is (surface or axis) and then what is acting as the datum (surface or axis) to determine how the parallelism is to be controlled.
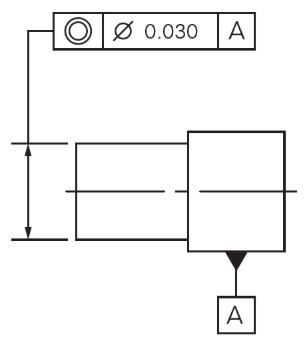
Concentricity symbol - sometimes called coaxially, is a tolerance that controls the central axis of the referenced feature, to a datum axis.
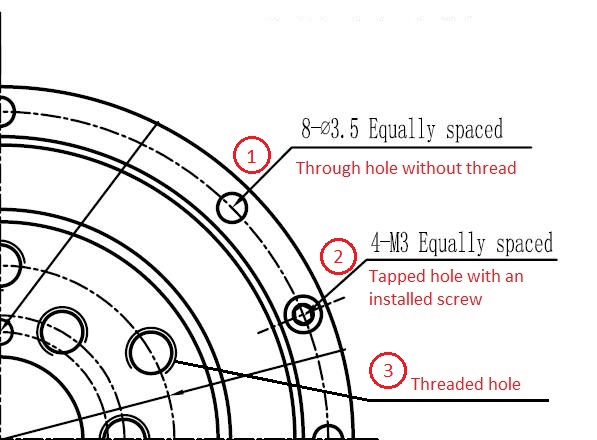
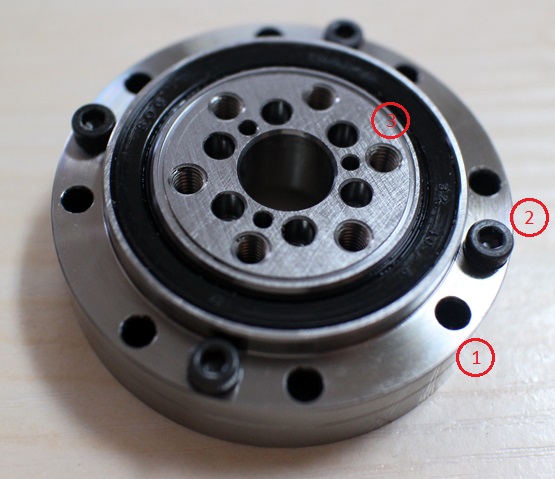
Bearing mounting holes symbol meaning in the drawing. Some specially designed bearing products like CSF/CSG drive gear bearing is with multiple mounting holes. It's easily got confused, but if you know the regular pattern of bearing drawing symbols, everything will become clear.
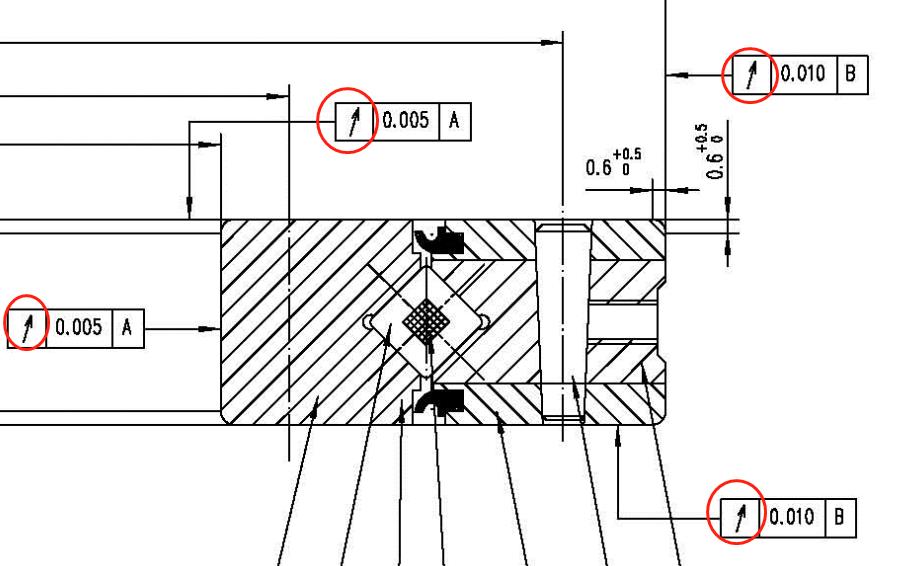
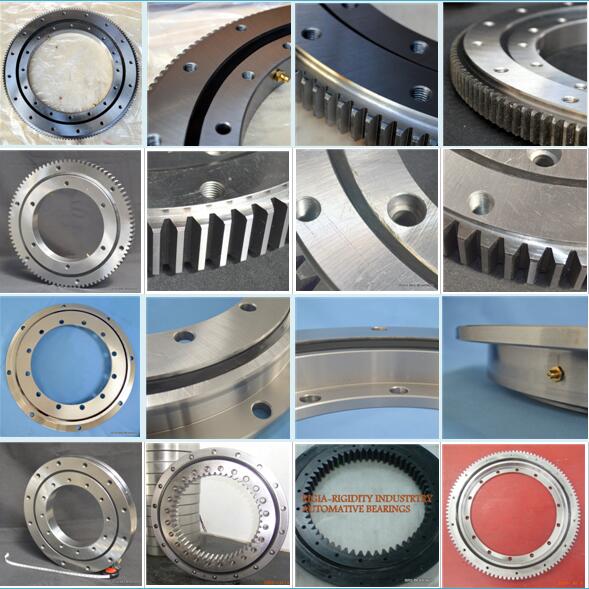
The bearing runout symbol is the most common symbol on a crossed roller bearing drawing or slewing bearing drawing.
It is how much one given reference feature or features vary with respect to another datum when the part is rotated 360° around the datum axis. Runout shows the running accuracy of a bearing. Usually, the runout is divided into axial run-out and radial run-out. And the standard value is different based on bearings dimensions and structure.

